
In this blog post, we will discuss the importance of using an SSL certificate for localhost and provide a step-by-step guide on how to set it up for local development. By the end of this article, you should have a good understanding of SSL certificates and be able to secure your local web server with HTTPS. So, let’s get started!
What is a Certificate?
The first thing we need to understand is what a certificate is and why it is important. A certificate, also known as a digital certificate or an SSL certificate, is a small data file that digitally binds a cryptographic key to an organization’s details. It allows secure communication over a computer network and is used to verify the identity of a website or server.
When you visit a website that has an SSL certificate, your web browser is able to establish a secure connection with the server and encrypt all data transmitted between your computer and the website. This ensures that sensitive information, such as login credentials or credit card details, cannot be intercepted by malicious third parties.
Localhost and the Importance of SSL
Now, let’s talk about localhost.
“Localhost” is the standard hostname given to the address of a local computer. It is used to access the network services that are running on the host via the loopback network interface.
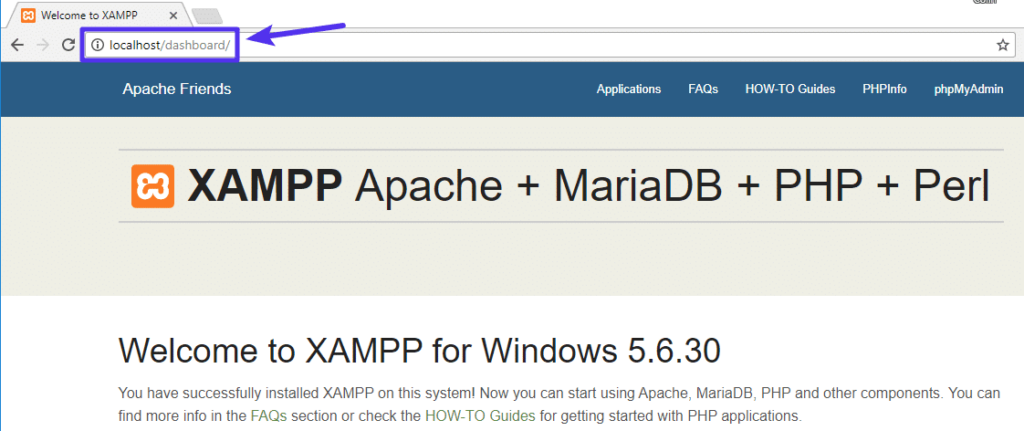
When you are developing a website or web application locally, you typically access it using “localhost” in your web browser.
While it might seem unnecessary to use an SSL certificate for localhost since it is not accessible from the public internet, there are several reasons why it is important:
- Security: Even on your local machine, sensitive data can be transmitted and stored. Using an ssl certificate for localhost ensures that this data remains secure and cannot be easily intercepted.
- Local Testing: If you are developing a website that will use HTTPS in production, it is important to test it locally with HTTPS as well. This helps you identify and fix any issues related to SSL certificates before deploying your website.
- Secure Cookies: Modern web browsers block cookies on HTTP connections and only allow them on HTTPS connections. If you want to test cookies in your local development environment, you need to use HTTPS, which requires an ssl certificate for localhost.
- Modern Web Features: Many modern web features and APIs, such as Service Workers, Geolocation, and Push Notifications, require a secure context, which means they can only be used on pages served over HTTPS. To test these features locally, you need an ssl certificate for localhost.
Understanding SSL Certificates
Before we dive into setting up an SSL certificate for localhost, let’s take a brief moment to understand the different types of certificates and how they work.
An SSL certificate typically consists of a public key, a private key, and a digital signature. The public key is used to encrypt data sent to the server, while the private key decrypts the data on the server-side.
The digital signature verifies that the certificate is issued by a trusted certificate authority (CA).
There are three main types of SSL certificates:
- Domain Validation (DV) Certificates: These certificates validate the domain name and provide basic encryption. They are suitable for personal websites or blogs.
- Organization Validation (OV) Certificates: In addition to domain validation, these certificates also verify the organization’s identity and provide a higher level of trust. They are commonly used by businesses and e-commerce websites.
- Extended Validation (EV) Certificates: These certificates offer the highest level of validation and security. They turn the address bar green in compatible browsers, indicating that the website has undergone extensive verification and is highly secure. EV certificates are often used by banks and other organizations handling sensitive data.
For localhost, we will be creating a self-signed SSL certificate, which means it is signed by its own creator and not by a trusted CA. While self-signed certificates are not suitable for public-facing websites, they are perfect for local development and testing purposes.
Setting Up SSL Certificate for Localhost
Now comes the fun part – setting up an SSL certificate for your localhost environment!
We will walk you through the process step by step, and by the end of this section, you should have a fully functional HTTPS connection on your local web server.
Generating a Self-Signed Certificate
The first step is to generate a self-signed SSL certificate for localhost. We will be using OpenSSL, which is a popular open-source toolkit for managing certificates, keys, and other encryption-related tasks.
If you don’t have OpenSSL installed on your system, you can download it from the official website and install it.
Open a terminal or command prompt and navigate to the directory where you want to generate the certificate files. Then, run the following commands:
openssl req -x509 -nodes -newkey rsa:2048 -keyout localhost.key -out localhost.crt -days 365 -subj "/CN=localhost"Let’s break down this command:
openssl: This is the command-line tool provided by OpenSSL.req: This specifies that we want to work with X.509 certificate signing requests.x509: This option is used to sign a certificate with a private key.nodes: This option tells OpenSSL not to encrypt the private key with a passphrase.newkey rsa:2048: This generates a new private key with a length of 2048 bits.keyout localhost.key: This specifies the output file for the private key.out localhost.crt: This specifies the output file for the certificate.days 365: This sets the validity period of the certificate to 365 days.subj "/CN=localhost": This sets the subject of the certificate to “Common Name (CN)=localhost”.
Once you run this command, OpenSSL will prompt you to enter some additional information about the certificate.
You can leave most of the fields blank and just press Enter to use the defaults. However, make sure to enter your correct country code and locality when prompted.
After completing this step, you should have two files: localhost.crt (the self-signed certificate) and localhost.key (the private key).
Configuring Your Local Web Server
The next step is to configure your local web server to use the SSL certificate and key files we just generated. The process will vary depending on the web server you are using. Here are the instructions for some of the most popular web servers:
Apache
If you are using Apache, you need to edit the virtual host configuration file for your website. Locate the <VirtualHost> block for your site and add the following lines inside it:
SSLEngine on
SSLCertificateFile /path/to/localhost.crt
SSLCertificateKeyFile /path/to/localhost.key
Make sure to replace /path/to/ with the actual path to your certificate and key files.
Then, restart Apache for the changes to take effect:
service apache2 restartNginx
For Nginx, you need to edit the server block configuration file for your website. Add the following lines inside the server block:
listen 443 ssl;
ssl_certificate /path/to/localhost.crt;
ssl_certificate_key /path/to/localhost.key;
Again, replace /path/to/ with the actual path to your certificate and key files.
Restart Nginx to apply the changes:
service nginx restartIIS
If you are using IIS on Windows, open the IIS Management Console and select your website. In the “Actions” pane, click on “Bindings”. Add a new binding with the following settings:
- Type: https
- IP address: The IP address of your localhost (usually 127.0.0.1)
- Port: 443
- SSL certificate: Browse and select your
localhost.crtfile
Save the changes and restart IIS for them to take effect.
Testing Your SSL Certificate
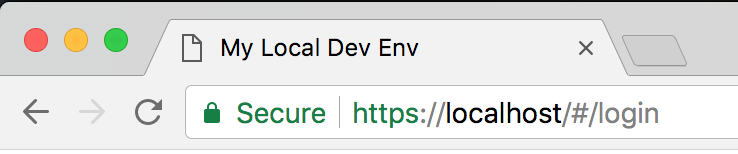
Now that you have configured your web server, it’s time to test your SSL certificate for localhost. Open your web browser and navigate to https://localhost or https://127.0.0.1. If everything is set up correctly, your website should load securely over HTTPS, and you should see a padlock icon in the address bar, indicating a secure connection.
Depending on your browser settings, you might get a warning about the certificate being self-signed or untrusted. This is expected behavior since we are using a self-signed certificate that is not issued by a trusted CA. You can safely ignore this warning during local development.
Advanced Topics
In this section, we will cover some advanced topics related to using an ssl certificate for localhost. These topics will help you understand the underlying concepts better and provide you with additional tools and techniques for managing local SSL certificates.
Creating a Local Certificate Authority (CA)
In the previous section, we created a self-signed certificate for localhost. While this works fine for local development, it can be cumbersome if you have multiple projects or need to distribute your local certificate to other team members. In such cases, creating a local CA and signing certificates for each project can be a more manageable approach.
Here are the steps to create a local CA:
- Generate a root CA certificate and private key: “`openssl req -x509 -new – key rsa:2048 -sha256 -nodes -out rootca.crt -keyout rootca.key -days 3650 -subj “/CN=Local CA”
This command will generate a root CA certificate (`rootca.crt`) and private key (`rootca.key`) valid for 10 years.
2. Install the root CA certificate on your system:
– Windows: Double-click on the `rootca.crt` file and follow the installation wizard.
– Mac: Open Keychain Access, go to the “Certificates” category, and click on “File” > “Import Items”. Select the `rootca.crt` file and follow the instructions.
– Linux: Copy the `rootca.crt` file to the `/usr/local/share/ca-certificates/` directory and run `sudo update-ca-certificates`.
3. Generate a certificate signing request (CSR) for your project:
openssl req -new -nodes -newkey rsa:2048 -sha256 -keyout project.key -out project.csr -subj "/CN=localhost"Replace `project.key` and `project.csr` with the desired filenames for your project’s private key and CSR.
4. Sign the CSR with your local CA:
openssl x509 -req -in project.csr -CA rootca.crt -CAkey rootca.key -CAcreateserial -out project.crt -days 365 -sha256This command will sign the CSR (`project.csr`) with the root CA certificate (`rootca.crt`) and private key (`rootca.key`) and generate a signed certificate (`project.crt`) valid for 1 year.
5. Configure your local web server to use the signed certificate (`project.crt`) and private key (`project.key`).
By following these steps, you can create a local CA and sign certificates for each of your projects. This allows you to have separate certificates for different projects while still maintaining a trusted local CA.
Using mkcert for Local Development
Another useful tool for managing SSL certificates for localhost is `mkcert`. `mkcert` is a simple command-line tool that automatically creates and installs trusted local development certificates. It eliminates the need to manually generate and install self-signed certificates or create a local CA.
To use `mkcert`, follow these steps:
1. Install `mkcert` by following the instructions in the [official documentation](https://github.com/FiloSottile/mkcert#installation).
2. Generate a certificate for your project:
mkcert localhost
“`
This command will generate a certificate for localhost and save the certificate (localhost.pem) and private key (localhost-key.pem) files in the current directory.
- Configure your local web server to use the generated certificate and private key. The exact steps will depend on the web server you are using, but the general process is similar to what we discussed earlier.
By using mkcert, you can quickly generate trusted certificates for localhost without the complexity of managing a local CA or dealing with self-signed certificates.
Q: What is an SSL Certificate for Localhost?
A: An SSL certificate for localhost is a digital certificate that enables secure connections between a user’s computer and their local server, allowing encryption of data exchanged over the network.
Q: How can I create a self-signed SSL certificate for localhost?
A: You can create a self-signed SSL certificate for localhost by generating a private key and then creating a self-signed certificate using tools like OpenSSL.
Q: Why is it important to use SSL certificates for localhost?
A: Using SSL certificates for localhost is important because it helps encrypt data transmitted between the local server and the user’s computer, enhancing security and preventing unauthorized access.
Q: What is a trusted root certificate?
A: A trusted root certificate is a certificate issued by a trusted SSL certificate authority that is recognized as authentic and can be used to validate the identity of other certificates in the certificate chain.
Q: How can I make my locally hosted website HTTPS secure?
A: You can make your locally hosted website HTTPS secure by configuring your local web server to use the generated SSL certificate, enabling HTTPS communication on port 443.
Q: Can I use Let’s Encrypt for securing my localhost?
A: Let’s Encrypt is primarily used for securing domain names and is not recommended for securing localhost setups. It is best to use self-signed certificates for local development environments.
Q: What should I do if I see a “not secure” warning when accessing my localhost over HTTPS?
A: If you see a “not secure” warning, it may be due to using a self-signed SSL certificate. You can bypass this warning by adding the certificate to your trusted root store or by generating a certificate signed by a trusted root.
Q: How do I set up SSL certificates on Windows 10 for localhost?
A: To set up SSL certificates on Windows 10 for localhost, you can follow similar steps to generating certificates on other platforms using tools like OpenSSL and configuring your local server accordingly.
Q: What are the steps to get a locally trusted SSL certificate?
A: To get a locally trusted SSL certificate, you need to create a private key, generate a self-signed certificate, and then configure your local web server to use these certificates for HTTPS communication.
Conclusion
In this article, we discussed the importance of using an ssl certificate for localhost in your local development environment.
We explored the different types of SSL certificates and their significance. We also provided a detailed guide on setting up an SSL certificate for localhost using OpenSSL and configuring popular web servers.
We covered advanced topics such as creating a local certificate authority and using tools like mkcert to simplify the process of managing SSL certificates for localhost.
By following the steps outlined in this article, you should now have a secure HTTPS connection for your local web server, allowing you to test and develop your websites and applications in a safe and secure environment.
Remember, while SSL certificates for localhost are not required for public-facing websites, they play a crucial role in ensuring the security and integrity of your local development environment. So, make sure to implement SSL certificates for localhost and stay ahead in the world of secure web development.
Read also: