HOW TO INSTALL AN SSL/TLS CERTIFICATE IN PLESK 12.
An SSL certificate is a small data file that binds an organization’s details to a cryptographic key digitally of which when the certificate is installed on a web server it activates a HHTPS protocol and a padlock allowing secure connection between a web browser and the server.
Plesk is a web hosting platform that is commercial that has a control panel which allows a server administrator to make new e-mails, websites, DNS entries and reseller accounts through a web-based interface. The administrator can still create client and site templates which will then then predetermine resource allocation parameters for the clients and domains.
Procedure to install the SSL certificate in in Plesk 12.
If you have an SSL issued to you legally then proceed with the following instructions step by step:
- Log into your Plesk panel.
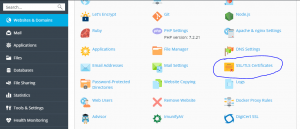
- Go to the tab containing “websites and domains” and select the domain you wish to secure.
- Click “Secure your sites”.
- Then here you select the SSl certificate that was generated while in generation of the certificate signing request code. You can define it also by its domain name.
- On the succeeding page locate the section containing the” upload certificates files”. Then go ahead to click “browse” and locate the certificates and the certificate authority bundle files from your device. The certificate files should have an extension .crt or .ca-bundle.
After the both files have been selected move on by clicking “send files”. On the other hand you can copy the paste the certificates along with the certificate authority bundle in the boxes under the “upload the certificate” as the text then click “Send text”.
Please note that if your private key with the CSR was not generated on Plesk click on the icon near the domain name in the SSL certificate section uploading the corresponding key for it. When that is fully accomplished move on to uploading the certificate files as in the previous steps.
- Now return to the tab “Websites and Domain” then click on hosting settings next to the domain that is involved in our case.
- On the succeeding page locate the section containing security then go on to select the certificate from the drop down list and make sure checking of SSL Support is done.
- Now move to the bottom of the page then click ok so as to save the changes that have been made.
Now the site should be accessible via https:// from this point.
Congratulations! The SSL certificate is now fully installed in your Plesk 12 platform.